INTRODUCTION TO POLYGEL NAILS
The main question everyone has been asking is “What are Polygel nails?”
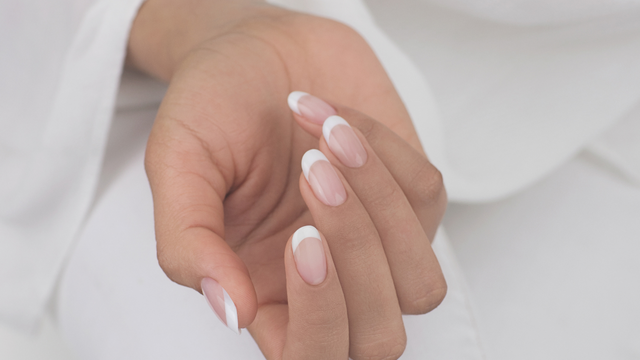
Imagine if acrylic nails and gel nails got married and had a baby - that would be Polygel nails! Polygel is a nail enhancement best described as a hybrid formula that combines the durability of acrylic nails and the elasticity of gel nails. Everyone has been talking about this new method for nail extensions and we're about to tell you everything you need to know.
Polygel is a game changer in the nail industry. The process and materials used for polygel nails manicures are a very unique. The polygel which is in a tube that looks like toothpaste, is a mixture of acrylic powder and clear gel. The polygel has a putty-like consistency and is easy for even beginners to apply on their nails and shape them. Getting the right polygel nail kit is the best way to start.
For the best polygel kit, we recommend going with well known, professional lines such as the Gelish Polygel Collection. Not an acrylic, not a hard gel, Gelish PolyGel combines the best of both in a revolutionary all-in-one system that's undeniably better! Years in development and extensively salon tested; users agree that Gelish PolyGel delivers strong, flexible, feather light nails, that is odorless and with no airborne dust.
Now you can shop the entire Gelish PolyGel line on Beyond Polish.

TOOLS
The tools you would need for your polygel nail is:
- Polygel color tube
- Polygel Slip Solution - this product will help you move or shape the polygel easily.
- Polygel tool
- Polygel brush
- Lamp
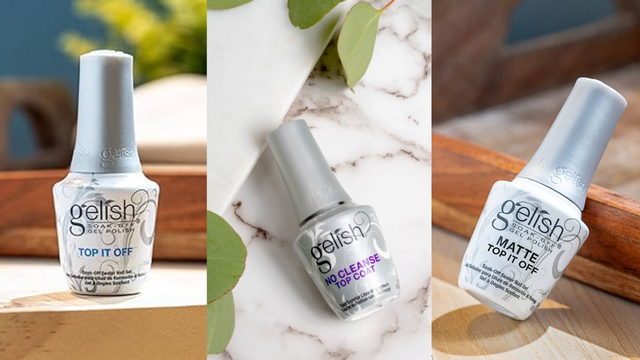
- Top coat
Or you can get most of the product in the Polygel Kit here.
For the Gelish polygel tube, we have 6 colors to choose from.
- Natural Clear
- Soft White
- Bright White
- Dark Pink
- Light Pink
- Cover Pink
APPLICATION
The next big question is “How do I apply polygel?” Well, polygel has 6 simple steps! Before you start your polygel nail, prepping is always the best practice to get a long-lasting manicure. Wash your hands and use a nail dehydrator to make sure there is no oil or lotion on your nails. Then, start the 6 simple steps!
- SQUEEZE
- SLICE
- ROLL
- SHAPE
- CURE
- TOP
Yes, polygel nail is as simple as that. Let’s go into details of each step.
SQUEEZE
Squeeze a pea sized amount of product.
SLICE
Use the polygel tool to splice the product.
ROLL
Roll the product onto your nails
SHAPE
Take the polygel brush and dip into the Slip solution. Start shaping to fit your nails. The Slip solution is to help make the polygel shape easily.
CURE
Cure your polygel manicure for 60 seconds using the Gelish 18G LED light.
After curing the polygel nail, hand file to smooth out any bumps or uneven areas.
TOP
Apply a thin layer of the Gelish Top It Off top coat and cure it for 30 seconds in the Gelish lamp. Cleanse the nail surface cleanser with a lint-free wipe. Last but not least apply cuticle oil on your cuticles!
Once you are done with your polygel mani, don’t forget to tag us on social at @beyondpolish and use the hashtag #PolishWithBeyond so we can see the final results! We love to feature a BP fam every Friday.
If you are a visual learner, Here is a youtube video on how to use Gelish Polygel
HOW TO REMOVE POLYGEL NAILS?
- To remove your polygel, cut your nails.
- E-file down the top layout of your polygel nails. Don’t go too thin.
- Take a hand file and file the last bit remaining on your nails.
- Time to take the Gelish cleanser and remove any dust off your nails.
- Apply Gelish PH bond onto your nails.
Longevity
Longevity depends on how well you prep your nails and the growth of your nails. All manicures last depend on a person’s lifestyle as well. Follow the steps and your polygel manicure should last you up to 4 weeks!
Safety
Just like any manicure it is safe if you apply and remove properly. Polygel nails is the safest nail enhancement because there is no odor!
Price
Polygel nails range from $50 to $150 for a full set or sculpted extension. If you are going in for a fill, it is no more than $80. Doing your own polygel nails with a polygel nail kit can save quite a bit of money. With the pandemic still going on, DIY polygel nails is still a great way to keep you busy!
Buy
If you are not ready to leave the house because of this pandemic still going on then you are in luck! We now carry Gelish Polygel nail sets!
You do not have to leave your house to get your nails done. You can learn all about polygel nails and attempt to try them at home. You don’t even need to leave your home to get the polygel nail sets! We will ship it to you.
Pros about Gelish Polygel
The great part about using the Gelish Polygel is that there is no waste of product and no odor! You can control how much product is coming out from the tube. You need very little product just to cover your natural nails. With regular nail polish, we all know the smell is not that great for your health so Gelish Polygel is healthier for you.
Now that you are an expert on polygel nails, are you ready to try it out? If you are, let us know in the comments down below! We love to know your thoughts about polygel nails.
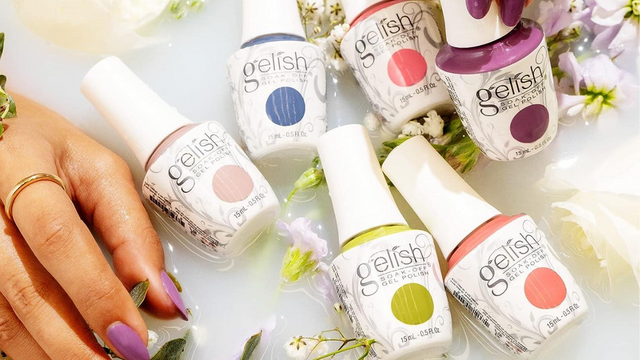
Are you interested in more Gelish nail polish? The Gelish Feel The Vibes collection has 6 bold shades that is going to have you ready for Summer time.

Not into bold colors? Shop more Gelish nail polish. There are many great nail polish that will fit your special occasion and season.

Since you already love shopping with us, don’t forget to sign up for our FREE reward program. Our Reward Shop has many products and discounts for you to claim your hard-earned points! Why not sign up? It does not cost you anything.

Do you have a friend that loves nail polish as much as we do? Refer them! We do have a Refer-A-Friend program! You and your friend can get $5. That is basically a free nail polish!

Don’t forget to download our app! We currently have an exclusive promo going on for all our app lovers out there. Whether you are shopping with us online or on the app, your experience is always important. On the app, it is just easier. Oh! We also love to do early access on the app only. Download now and stop missing out.


4 comments
Thanks for breaking down the polygel process! 💅
One tip I’d like to add is to ensure a smooth application by using a thin layer of the polygel – it works wonders for shaping and molding the polygel effortlessly. Plus, don’t forget to hydrate those cuticles after your mani, a little extra care goes a long way.
https://www.planetnails.com.au/gels/polygel/
I love Gelish brand polygel. It is my absolute favorite!
Why isn’t the clear gel still not cured after 60 seconds or more
Hi,
I wounder why the clear polygel does’nt cure?! I’ve tried in so many ways to check out all possible reaons why,but I’m not getting any wiser😅
Any recommendations?🙏🏻