Your love affair with gel manicures is coming to an end. In case you haven't heard, dip powder manicures are on the rise and with year, they're becoming increasingly popular. So why do people love them so much?
A dip powder manicure is an alternative to a gel manicure. Why? Dip powder is odorless. Best of all, it does not require a UV/LED lamp, yet you get the same, long-lasting results that you do with a gel manicure. Not to mention, it applies in half the time of acrylics. Still not convinced?
Eager to find out more about dip powder treatments, we tested the manicure out for ourselves. To our surprise, the process is so easy you can do it yourself...in the comfort of your own home!
In this tutorial, we used Revel Nail Dip Powders. Their formulas are cruelty-free, vegan, and 7-free (does not contain the toxins Formaldehyde, Toulene, DBP, Formaldehyde Resin, Camphor, Ethyl Tosylamide, and Xylene). Revel Nail offers over 250 colors of dipping powder. For this tutorial we want to find the perfect french manicure blush by choosing Scarlet Flawless Pink.
We'll be using Revel here, but be sure to check out the other dip powders available!
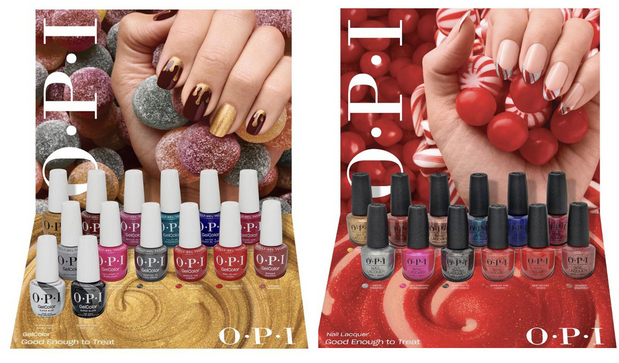
- OPI Powder Perfection
- DND DC Dip Powder
- Kiara Sky Dip Powder
- Revel Nail Dip Powder
- SNS Dip Powder
- NuRevolution Dip Powder
- Harmony Gelish Dip Powder
WHAT YOU'LL NEED:
- Dip Powder in your choice of color
- One Liquid Set or
- 1 Base Coat
- 1 Activator
- 1 Top Coat
- Manicure Buffer
- Emery Board Nail File
STEP 1.

Create a smooth surface. Prep your nails by using a manicure block or a nail drill to create an even surface for the powder to be applied to. Push back and trim your cuticles but avoid using cuticle oils - this will prevent the powder from applying.
STEP 2.

Used Above: Revel Nail Base Coat
Apply your first coat on your first nail. Apply one thin, even coat of #1 Base Coat. Stop short of the cuticle. This is what the powder will adhere to, so make sure you get full coverage on your nail while keeping the coat as thin as possible. This will allow for an even, smooth powder application.
STEP 3.

Used Above: Revel Nail Dip Powder - Scarlet Flawless Pink
Time to dip your first nail! Cover the first nail in dipping powder by dipping your nail at an angle. Make sure you're entire nail is emerged for even coverage. Remove and gently tap the side of your finger to remove any excess powder.
Repeat step 2 and 3 as you continue this process across both hands, one nail at a time. For full coverage, apply a second thin, even base coat to each nail again. Repeat the process one more time for a second coat and brush of the excess powder. We used a loose brush to wipe away excess powder from our nails and hands.

STEP 4.
Activate the powder by applying a generous coat of #2 Revel Nail Activator on each nail. You'll see the dipping powder color darken and become more opaque. Allow to completely dry. Be sure to cover the edges and cap off the tips of the nails.

Once your nails are dry, use an emery board nail file to shape your nails. We prefer the Best Nail Shape for 2019, almond shaped nails, but this time we went for a more classic squoval. Check our Guide To Finding The Best Nail Shape to find the best nail shape that will flatter your fingers.
After you finish shaping your nails, be sure to apply another coat of Activator to each nail. Allow to dry for at least two minutes.

STEP 5.
Top it off by applying #3 Revel Nail Finish Gel. Wait 15 seconds and then apply a second coat of #3 Finish Gel. After the nails have completely dried (about 1-2 minutes), apply cuticle oil to treat and moisturize your nails.

Used Above: Revel Nail Finish Gel
STEP 6. THE FINAL #NAILFIE

So easy! Let us know how this tutorial works out for you. Show us your dip powder manicure by tagging us in your photos. Find us on Instagram @beyondpolish and #GoBeyondTheBottle.
For more, watch this video from Revel Nail for a complete, step-by-step process.
Video by Revel Nail via YouTube
Start dipping! Visit our collection of OPI, Revel Nail, Kiara Sky, DND, SNS, and NuRevolution powder nail dipping powders. Click to shop the entire collection.
Want to learn how to remove your dip nails?


35 comments
I used all the brands of dip and it says to base dip base dip activate base file activate top coat of coarse brush excess after dips and every brand top coat dulls and leaves white patches once in a great while it will coat right but so aggravating when I’m a nail tech and people paying for this it did this at school too and instructors knew nothing? Why does this happen? I’ve had to top coat with a gel top coat and cure in light and that’s defeating h the purpose of not using the light for dips.. help please
I did dip all the time at the salon and loved it! Then my nails started breaking low close to nail bed and it the nail bed—. Nail technicians were using the drill over and over to smooth my nails for the application- biggest mistake it has now been close to 4 months with nothing on my nails to allow them to completely grow out after much work and time I finally have my beautiful strong nails back. If you’re going to use Dip; never allow them or yourself to use the drill. Always just buff and when you change it do not try to accelerate the time by using the drill; it’s literally thinning your nails which is what caused all of my problems!!!
Yes, it’s a timely process and you can do some cool thinks but be cautious and always research the right way and NEVER trust someone telling you it’s how to do something- nails are not ever meant to be drilled if you want to keep your own nails
I just started dipping my own nails recently, because gel was ruining my nails and not lasting long at all. I’ve yet to have problems with the Revel dip. The Revel starter kit, about $35, came with everything I needed to start (expect file and brush, but I have those) and my choice of color. If you’re good at painting your own nails you’ll be just fine doing this on your own.
I just started doing dip nails using OPI. The top coat does not dry glossy, but a patchy, matte. What am I doing wrong?
Hi! I’m concerned about if this is sanitary or not. I’m a nail tech and having all my clients dip their nails in the same container over and over just seems wrong. In fact, it goes against everything I was taught. So how do u avoid actually dipping and keep it sanitary for each client?